Rocky Road isn’t just ice cream—it’s a little scoop of happiness. You’ve got creamy chocolate, crunchy nuts, and gooey marshmallows all coming together for the ultimate blend of flavors and textures. Fun fact: it first came to life in the 1920s to bring people a bit of joy during tough times. Fast-forward to today, and with the Ninja Creami, whipping up a batch at home is quick, easy, and totally customizable.

Quick Recipe Breakdown
- Prep time: 10 minutes
- Freezing time: 24 hours
- Churning time: About 5 minutes
Yields: 1 pint—ideal for sharing with 2–3 people. Making dessert for a crowd? Double or triple the ingredients, and use extra Ninja Creami pints.
Skill level: Beginner. Seriously, the Ninja Creami does most of the work, so no stress if it’s your first time making ice cream.
What you’ll need:
- A Ninja Creami machine with a pint container
- A mixing bowl
- A whisk (or an immersion blender if you want to get fancy)
No Ninja Creami? You can swap it for a regular ice cream maker, though the texture might be a tad different.

Ingredients You’ll Need
Base Ingredients
- 1½ cups milk (whole or 2% for creaminess)
- 3 tablespoons instant sugar-free chocolate pudding mix (regular works too)
- ½ cup heavy cream
- ½ teaspoon vanilla extract
Mix-ins
- ¼ cup chopped almonds (or your favorite nuts)
- ¼ cup mini marshmallows
Ingredient Tips
- Milk: Whole milk gives the richest texture, but 2% or even almond milk works for a lighter version.
- Pudding mix: This keeps things creamy without dealing with eggs. Regular pudding mix? Add 4 tablespoons for extra flavor.
- Heavy cream: Can’t skip this—it’s what makes your ice cream so luscious. For a dairy-free version, try coconut cream.
- Nuts & marshmallows: Swap almonds for pecans, peanuts, or walnuts. Vegan marshmallows? Totally fine!

How to Make It
Step 1: Mix It Up
Grab a mixing bowl. Whisk together the milk and pudding mix until smooth—no lumps allowed. Then, stir in the heavy cream and vanilla extract. You’re aiming for a glossy, slightly thickened mixture.
Shortcut: Use an immersion blender for a silky-smooth base.
Step 2: Freeze It
Pour the mixture into your Ninja Creami pint container, making sure not to go over the max fill line. Pop the lid on and freeze it for a full 24 hours on a level surface.
Heads up: Freezing unevenly? Make sure your freezer is nice and flat.
Step 3: Churn Time
Once frozen, take the container out of the freezer and remove the lid. Lock it into the Ninja Creami machine. Select the “Lite Ice Cream” function and let it do its thing.
What to look for: The ice cream should be smooth but firm. If it’s still a bit crumbly, hit the “Re-spin” button for a better texture.
Step 4: Add the Extras
Time for the fun part! Use the back of a spoon or a knife to make a well in the center of the ice cream (all the way to the bottom). Toss in half of your almonds and marshmallows. Stick the pint back in the machine and press “Mix-In” mode.
Pro Tip: Freeze your marshmallows before adding them to stop them from melting during the mix-in process.
Step 5: Scoop & Enjoy
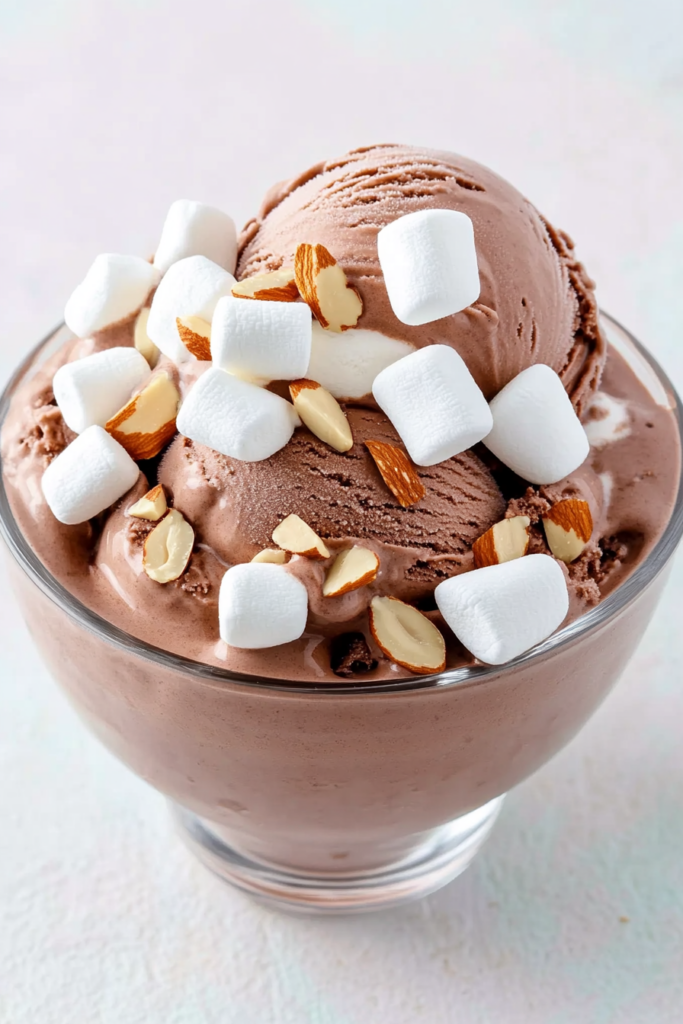
Scoop your Rocky Road into bowls or cones. Sprinkle the top with the remaining almonds and marshmallows for a little extra crunch. And that’s it—dessert is served!
Customize It Your Way
Want to switch it up? Here are a few ways to make this recipe your own:
Diet-Friendly Tweaks
- Vegan: Use almond or oat milk with coconut cream, and swap regular marshmallows for vegan ones.
- Low-carb: Sub out the pudding mix for unsweetened cocoa powder and sweeten with erythritol or monk fruit.
Fancy Add-Ons
- Feeling extra? Stir in dark chocolate chunks or drizzle melted chocolate on top.
- Keeping it simple? Stick to just nuts and marshmallows.
Seasonal Spins
- Holiday vibes: Add peppermint extract instead of vanilla for a festive twist.
- Summer fun: Mix in fresh berries along with the marshmallows.
Serving & Storing
How to Serve
Rocky Road shines in chilled bowls or crunchy waffle cones. Want to take it over the top? Garnish with extra nuts or a drizzle of caramel.
What to Pair It With
Warm brownies or fresh-baked cookies are the dream combo here. Trust me—it’s dessert heaven.
Storing Leftovers
Keep any leftovers in the Ninja Creami pint container with the lid sealed tight. It’ll stay good in the freezer for up to a week.
Pro Tip: If it gets too hard, just leave it on the counter for 5–10 minutes before serving, or use the “Re-spin” setting to soften it back up.
Rocky Road ice cream isn’t just a recipe—it’s a treat that brings people together. Whether you’re enjoying it on a quiet night at home or sharing it with friends, this classic dessert is all about making moments sweeter. Have fun experimenting, and happy churning!
PrintNinja Creami Rocky Road Ice Cream
Rocky Road ice cream is a classic treat that delivers the perfect harmony of rich chocolate, crunchy nuts, and fluffy marshmallows—all made effortlessly with your Ninja Creami. Enjoy a nostalgic favorite with a modern twist, right from the comfort of your kitchen.
- Prep Time: 10 minutes
- Total Time: 24 hours 15 minutes (Including Freezing Time)
- Yield: 2-3 1x
- Category: Dessert
- Cuisine: American
Ingredients
Base Ingredients:
- 1½ cups whole or 2% milk
- 3 tbsp instant sugar-free chocolate pudding mix
- ½ cup heavy cream
- ½ tsp vanilla extract
Mix-ins:
- ¼ cup chopped almonds (or nuts of choice)
- ¼ cup mini marshmallows
Instructions
1. Prepare the Ice Cream Base
- In a mixing bowl, whisk together milk and pudding mix until smooth and lump-free.
- Add heavy cream and vanilla extract. Stir gently until fully combined.
Pro Tip: Use an immersion blender for an extra-smooth base.
2. Freeze the Mixture
- Pour the mixture into the Ninja Creami pint container, stopping at the max fill line.
- Seal with the lid and freeze for 24 hours on a flat surface.
3. Churn the Ice Cream
- Place the frozen container in the Ninja Creami machine. Select the “Lite Ice Cream” setting and churn.
- If the texture is crumbly, use the “Re-spin” function until smooth and creamy.
4. Add the Mix-Ins
- Make a well in the ice cream with a spoon. Add half of the chopped almonds and marshmallows.
- Return the container to the machine and use the “Mix-In” function.
5. Serve and Enjoy
- Scoop into bowls or cones. Top with the remaining nuts and marshmallows for extra crunch and sweetness.
Notes
Serving Suggestions:
- Serve in waffle cones or chilled bowls for an authentic ice cream shop vibe.
- Pair with warm brownies or cookies for an indulgent dessert.
Storage & Reheating:
- Store leftovers in the Ninja Creami container with the lid sealed. Keeps up to 1 week in the freezer.
- Too firm after storage? Let sit at room temp for 5–10 minutes or use the “Re-spin” function before serving.
Tips & Tricks:
- Freeze marshmallows before adding to prevent melting during mixing.
- For a lighter version, use almond milk and coconut cream.

