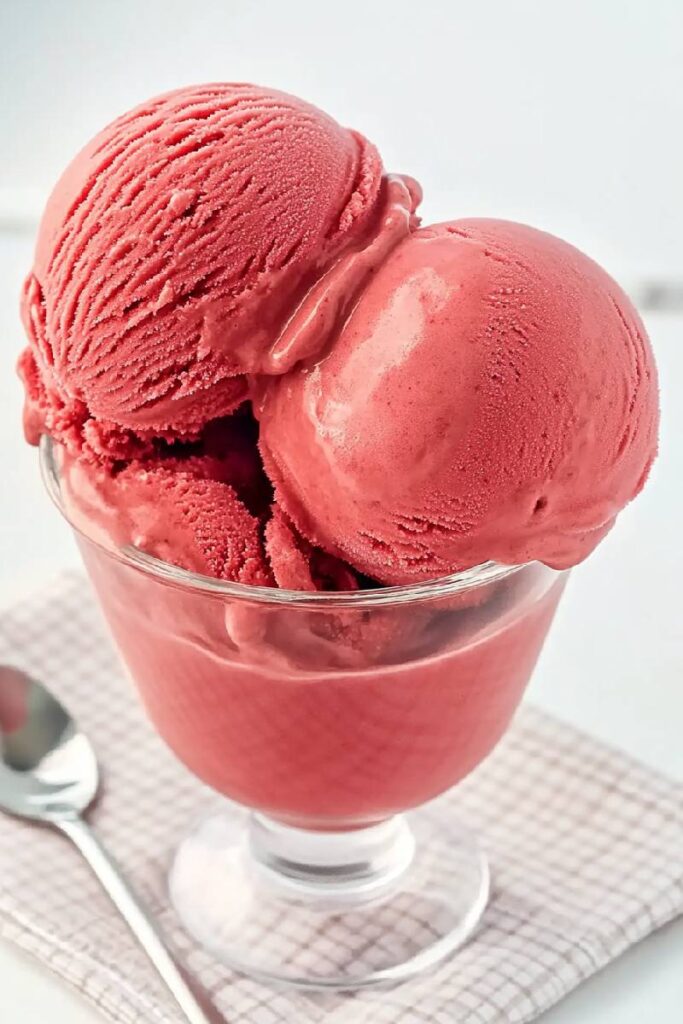
Red velvet cake. It’s indulgent, rich, and hard to resist. Now picture that iconic flavor—sweet, cocoa-kissed, with a hint of tang—transformed into a smooth, creamy ice cream. Sounds amazing, right? This recipe for Ninja Creami Red Velvet Cake Batter Ice Cream delivers all the magic of red velvet cake batter in a scoopable, frozen treat. Whether you’re a Ninja Creami pro or just here to try something fun, this one’s about to become a staple in your dessert lineup.
Quick Recipe Breakdown
Time Commitment
- Prep time: Around 15 minutes. Easy!
- Freeze time: At least 24 hours for the base to set properly.
Servings?
- It makes 2-3 servings. Want more? Just double or triple the ingredients (as long as your Ninja Creami pint containers can handle it!).
Difficulty?
- Beginner-friendly. If you can toast cake mix and stir ingredients, you’ve got this.
Tools You’ll Need:
- Ninja Creami Ice Cream Maker
- A baking sheet (lined with parchment paper)
- Microwave-safe bowl
- Whisk, spatula, and a couple small bowls
No Ninja Creami? No problem. You can freeze the mixture in a shallow dish and blend it in a high-speed blender.
The Ingredients
Here’s everything you’ll need:
- ½ cup red velvet cake mix (toast this for safety—see Step 1)
- ¼ cup cream cheese, softened
- ½ cup whole milk
- ½ cup heavy whipping cream
- ¼ cup granulated sugar
- Optional: A few drops of red food coloring (if you want a bold color)
- Optional mix-ins: ¼ cup white chocolate chips or cream cheese baking chips
Swaps You Can Try:
- No red velvet cake mix? Go with chocolate cake mix.
- No cream cheese? Mascarpone or Greek yogurt works too.
- Need non-dairy? Swap whole milk with almond or oat milk, and heavy cream with coconut cream.
Pro Tip: Toasting the cake mix isn’t just about safety; it deepens the flavor. Totally worth it!
Let’s Make It!
Step 1: Toast the Cake Mix
Preheat your oven to 350°F (175°C). Spread the cake mix on a parchment-lined baking sheet and bake for 5 minutes. This step gets rid of any bacteria in raw flour. Let it cool before using.
Step 2: Soften the Cream Cheese
Microwave the cream cheese for 15-20 seconds. You want it soft enough to mix easily.
Step 3: Start Mixing
In a bowl, combine the toasted cake mix and softened cream cheese until it becomes a paste. Add milk a little at a time (about 2 tablespoons per round). Stir until smooth. Once it looks more liquid, grab a whisk to blend it well.
Step 4: Add the Final Ingredients
Whisk in the heavy cream, sugar, and red food coloring (if using). Make sure the sugar is fully dissolved.
Step 5: Freeze the Base
Pour the mixture into your Ninja Creami pint container.
Important: Don’t go past the max fill line! Secure the lid and freeze for at least 24 hours.
Step 6: Spin into Ice Cream
The next day, take the pint out of the freezer. Pop it into your Ninja Creami and select the “Ice Cream” setting. If it seems crumbly after the first spin, hit “Re-spin” until it’s smooth and creamy.
Step 7: Add Mix-Ins (Optional)
Want some fun mix-ins like white chocolate chips? Make a small well in the center of the ice cream, add them, and select the “Mix-In” function. Done!
Ways to Make It Your Own
Dietary Modifications
- Gluten-free: Use gluten-free chocolate cake mix instead of red velvet.
- Vegan: Swap dairy for almond milk, coconut cream, and vegan cream cheese.
Add Some Spice
For a cozy twist, toss in a pinch of cinnamon or nutmeg.
Fancy It Up
Hosting? Top with whipped cream, crushed red velvet cookies, or drizzle melted white chocolate over each serving.
Seasonal Vibes
- Winter: Add a splash of peppermint extract.
- Summer: Mix in fresh berries.
How to Serve and Store
Serving Suggestions
Serve it in waffle cones or bowls. Want to impress? Garnish with sprinkles, white chocolate shavings, or even some red velvet crumbs.
Leftovers?
Store the ice cream in the same pint container with the lid tightly secured. It’ll stay fresh in the freezer for up to a week. Before serving again, let it sit at room temp for 10 minutes so it softens.
This Ninja Creami Red Velvet Cake Batter Ice Cream is pure fun. It’s rich, creamy, and tastes like the best part of cake batter—unbaked, sweet, and irresistible. Whether you’re sharing it at a party or enjoying a quiet scoop at home, this recipe is a winner. So grab your Ninja Creami and get spinning. You’re in for a treat!
PrintNinja Creami Red Velvet Cake Batter Ice Cream

This Red Velvet Cake Batter Ice Cream is creamy, tangy, and rich with the flavor of unbaked red velvet cake batter. Perfect for fans of indulgent, homemade frozen treats! Made using the Ninja Creami, it’s beginner-friendly, customizable, and bound to be a crowd-pleaser.
- Prep Time: 15 minutes
- Cook Time: N/A
- Total Time: 24 hours 15 minutes (Including Freezing Time)
- Yield: 2-3 1x
- Category: Dessert
- Cuisine: American
Ingredients
Ice Cream Base
- ½ cup red velvet cake mix (toasted to eliminate raw flour risk)
- ¼ cup cream cheese, softened
- ½ cup whole milk
- ½ cup heavy whipping cream
- ¼ cup granulated sugar
- Optional: red food coloring for bold color
Mix-ins (Optional)
- ¼ cup white chocolate chips or cream cheese baking chips
Instructions
- Toast the Cake Mix
Preheat oven to 350°F (175°C). Spread the red velvet cake mix on a parchment-lined baking sheet and bake for 5 minutes to remove raw flour risks. Let it cool. - Soften the Cream Cheese
Microwave cream cheese for 15-20 seconds until smooth enough to stir. - Prepare the Base Mixture
In a bowl, combine the toasted cake mix and softened cream cheese, stirring into a thick paste. Gradually add milk (2 tablespoons at a time), mixing until smooth. Use a whisk to blend once the mixture turns liquid. - Add Remaining Ingredients
Whisk in the heavy cream, sugar, and food coloring (if using) until the sugar dissolves. - Freeze the Base
Pour the mixture into the Ninja Creami pint container. Keep below the max fill line, secure the lid, and freeze for at least 24 hours. - Spin the Ice Cream
Place the frozen pint into the Ninja Creami, secure it, and select the “Ice Cream” function. Re-spin if needed for a smoother texture. - Optional Mix-ins
Add white chocolate chips or baking chips by creating a well in the ice cream, then select the “Mix-In” function.
Notes
Serving Suggestions
- Serve in bowls or waffle cones. Top with whipped cream, sprinkles, or crushed cookies for extra flair.
Tips & Tricks
- Make it dairy-free: Use almond milk and coconut cream instead of dairy.
- Don’t skip toasting the cake mix—it’s safer and enhances the flavor.
- Adjust the sweetness or tang by experimenting with sugar and cream cheese ratios.
Storage
- Store leftover ice cream in the original Ninja Creami pint container with the lid tightly secured. It will stay fresh for up to 1 week in the freezer.
Reheating/Softening
- Allow the ice cream to sit at room temperature for 10 minutes before scooping for the best texture.
This recipe captures the fun and indulgence of red velvet in ice cream form. Whether you’re making it for a party or satisfying a sweet tooth solo, this creamy dessert is always a winner!