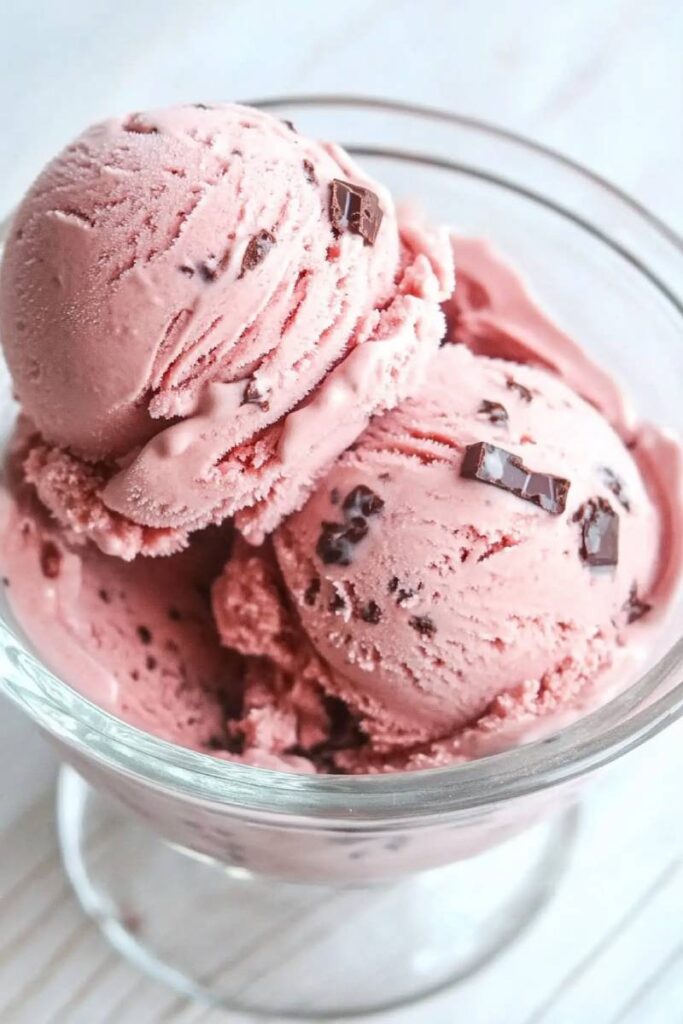
Cherries and chocolate. It’s the ultimate flavor combo, right? Sweet, fruity cherries meet rich, velvety chocolate—pure dessert magic. This Cherry Chocolate Ice Cream recipe takes that iconic pairing and turns it into a creamy, homemade treat.
The best part? You don’t need fancy skills or hours of prep. With a Ninja Creami, you can whip up gourmet-style ice cream right in your own kitchen. Whether it’s a cozy movie night or a hot summer day, this dessert is guaranteed to hit the spot.
Let’s get started!

Quick Recipe Cheat Sheet
- Prep Time: 5 minutes
- Freeze Time: 24 hours (the hardest part is waiting!)
- Servings: 1 pint (enough for 2–4 people)
- Difficulty: Easy-peasy—seriously, anyone can do this.
Equipment
- Ninja Creami
- Pint container (comes with the machine)
- Mixing bowl
- Spoon or spatula

Ingredients You’ll Need
Here’s what you’ll need to make this rich, cherry-packed dessert:
- 1/2 cup heavy whipping cream – Makes the ice cream silky and smooth.
- 1/2 cup whole milk – Keeps the texture just right.
- 2 tablespoons granulated sugar – Sweetens without being overpowering.
- 1 cup cherry pie filling – Adds that fruity punch.
- 1/4 cup brownie chunks or chocolate chips – Because chocolate. Enough said.
Substitutions & Tips
- Need a dairy-free version? Use coconut cream and almond milk.
- Want a healthier twist? Swap the brownie chunks for nuts or dark chocolate bits.
- If pie filling isn’t your thing, homemade cherry sauce works perfectly too—just be sure it’s cooled.

Let’s Make It
Here’s a simple, step-by-step guide to creating your very own Cherry Chocolate Ice Cream.
Step 1: Mix the Base
Grab a mixing bowl. Add the heavy whipping cream, whole milk, sugar, and cherry pie filling. Stir it all together until smooth. Don’t worry about a few cherry chunks—they add character!
Tip: Give the mixture a quick taste. Too tart? Add a little more sugar.
Step 2: Freeze It
Pour the mixture into your Ninja Creami pint container. Don’t overfill—stay below the max line. Pop the lid on tight and freeze it for a full 24 hours.
Heads up: It needs to be rock solid before you process it, so no shortcuts here.
Step 3: Process the Ice Cream
Take the frozen pint out of the freezer and fit it into the Ninja Creami. Lock it in according to the instructions and press the “Ice Cream” button.
In about two minutes, you’ll have creamy, dreamy ice cream. If it looks crumbly, don’t panic—just hit the “Re-spin” button, and you’re good to go.
Step 4: Add the Chocolate Goodies
Here’s where it gets fun! Use a spoon to carve a small well in the center of the ice cream (don’t worry, it doesn’t need to be perfect). Toss in your brownie chunks or chocolate chips.
Pop the pint back into the machine and press “Mix-in.” This step blends the mix-ins without smashing them.
Step 5: Serve & Enjoy
Scoop your Cherry Chocolate Ice Cream into bowls or cones. That rich, creamy texture with little bursts of cherries and chocolate chunks? Amazing.
Pro Tip: Got leftovers? Let the pint sit at room temp for 10 minutes before scooping—it softens beautifully.

Customization Ideas
Want to make this recipe your own? Try these fun variations:
- Vegan Version: Use coconut cream and almond milk.
- Seasonal Swaps: Replace cherries with strawberries in summer or cranberry sauce during the holidays.
- Add a Kick: A splash of cherry liqueur can make this an adults-only treat.
- Extra Fancy: Top it with whipped cream, fresh cherries, or shaved dark chocolate for a Pinterest-worthy dessert.
Serving & Storage
- Serving Tips: For a dessert upgrade, scoop it on top of brownies or serve alongside shortbread cookies.
- Storage: Keep leftovers in the pint container with the lid sealed tight. It stays fresh in the freezer for up to two weeks.
- Reheating (Kind of): Let the pint sit at room temperature for 10–15 minutes if it’s been in the freezer for a while. It’ll scoop like a dream again.
Final Thoughts
Making ice cream at home doesn’t have to be complicated, and this recipe proves it. With just a few simple ingredients and your trusty Ninja Creami, you can enjoy a dessert that’s way better than store-bought.
Cherry and chocolate lovers, this one’s for you. Happy scooping!
PrintNinja Creami Cherry Chocolate Ice Cream
Indulge in the perfect pairing of sweet cherries and rich chocolate with this creamy, homemade ice cream. Made with just a few simple ingredients and your Ninja Creami, this dessert is as easy to make as it is delicious. Perfect for a cozy treat or a festive gathering!
- Prep Time: 5 minutes
- Cook Time: N/A
- Total Time: 24 hours 5 minutes (Including Freezing Time)
- Yield: 2-4 1x
- Category: Dessert
- Cuisine: American
Ingredients
- 1/2 cup heavy whipping cream
- 1/2 cup whole milk
- 2 tablespoons granulated sugar
- 1 cup cherry pie filling
- 1/4 cup brownie chunks or chocolate chips
Instructions
Step 1: Mix the Base
- Combine heavy cream, milk, sugar, and cherry pie filling in a bowl. Stir until smooth with visible cherry chunks.
Tip: Taste the mixture and adjust sweetness if needed.
Step 2: Freeze
- Pour the mixture into your Ninja Creami pint container, staying below the max line. Secure the lid and freeze for 24 hours, or until completely solid.
Step 3: Process
- Remove the frozen pint and fit it into your Ninja Creami. Press the “Ice Cream” button. If the texture appears crumbly, use the “Re-spin” button until creamy.
Step 4: Add Mix-ins
- Create a small well in the ice cream and add brownie chunks or chocolate chips. Run the “Mix-in” function to evenly distribute.
Step 5: Serve
- Scoop into bowls or cones and enjoy immediately. If storing leftovers, let the pint sit at room temp for 10 minutes before scooping.
Notes
Serving Suggestions:
- Top with whipped cream, fresh cherries, or chocolate shavings for a fancy touch.
- Pair with warm brownies or shortbread cookies for an extra indulgent dessert.
Tips & Tricks:
- For a dairy-free version, substitute the heavy cream with canned coconut cream and the milk with almond milk.
- Use gluten-free brownies if needed.
Storage & Reheating:
- Store leftovers in the original pint container with a tightly sealed lid for up to 2 weeks.
- Allow the frozen ice cream to sit out for 10–15 minutes before scooping—it softens nicely.
This recipe is quick, easy, and endlessly customizable. Whether you’re a first-timer or an ice cream pro, it’s bound to become a household favorite!

